故障模拟与自动恢复
作为一个开源数据管理平台,KubeBlocks 目前支持三十多种数据库引擎,并且持续扩展中。由于这些数据库本身的高可用能力是参差不齐的,因此KubeBlocks设计实现了一套高可用系统用于保障数据库实例的高可用能力。KubeBlocks 高可用系统采用了统一的 HA 框架设计,实现对数据库的高可用支持,使得不同的数据库在 KubeBlocks 上可以获得类似的高可用能力和体验。
下面以 ApeCloud MySQL 为例,演示它的故障模拟和恢复能力。
故障恢复
下面通过删除 Pod 来模拟故障。在资源充足的情况下,也可以通过机器宕机或删除容器来模拟故障,其自动恢复过程与本文描述的相同。
开始之前
-
创建一个 ApeCloud MySQL 集群版,详情可参考创建 MySQL 集群。
-
执行
kubectl get cd apecloud-mysql -o yaml检查 ApeCloud MySQL 集群版是否已启用 rolechangedprobe(默认情况下是启用的)。如果出现以下配置信息,则表明已启用:probes:
roleProbe:
failureThreshold: 2
periodSeconds: 1
timeoutSeconds: 1
Leader 节点异常
步骤:
- kbcli
- kubectl
-
查看 ApeCloud MySQL 集群版。
在
Topology中查看 Leader 节点的名称。在这个例子中,Leader 节点为mycluster-mysql-1。kbcli cluster describe mycluster -n demo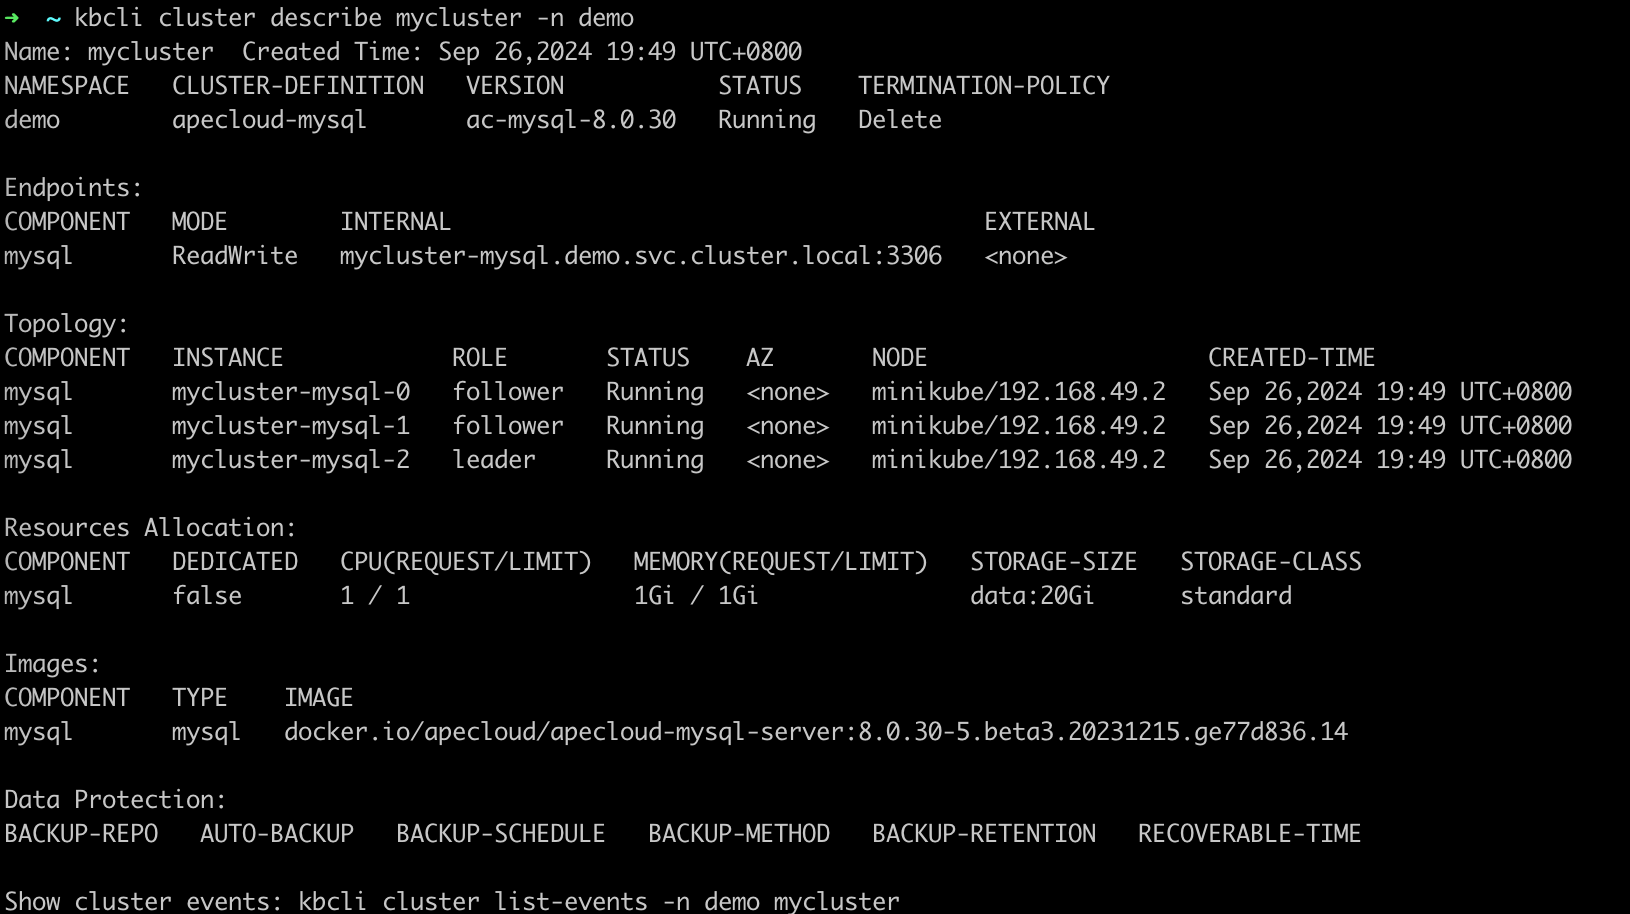
-
删除 Leader 节点
mycluster-mysql-2,模拟节点故障。kubectl delete pod mycluster-mysql-2 -n demo
-
执行
kbcli cluster describe和kbcli cluster connect命令,查看 pod 状态和集群连接。结果
此处示例显示 pod 角色发生变化。原 Leader 节点删除后,系统选出新的 Leader 为
mycluster-mysql-1。kbcli cluster describe mycluster -n demo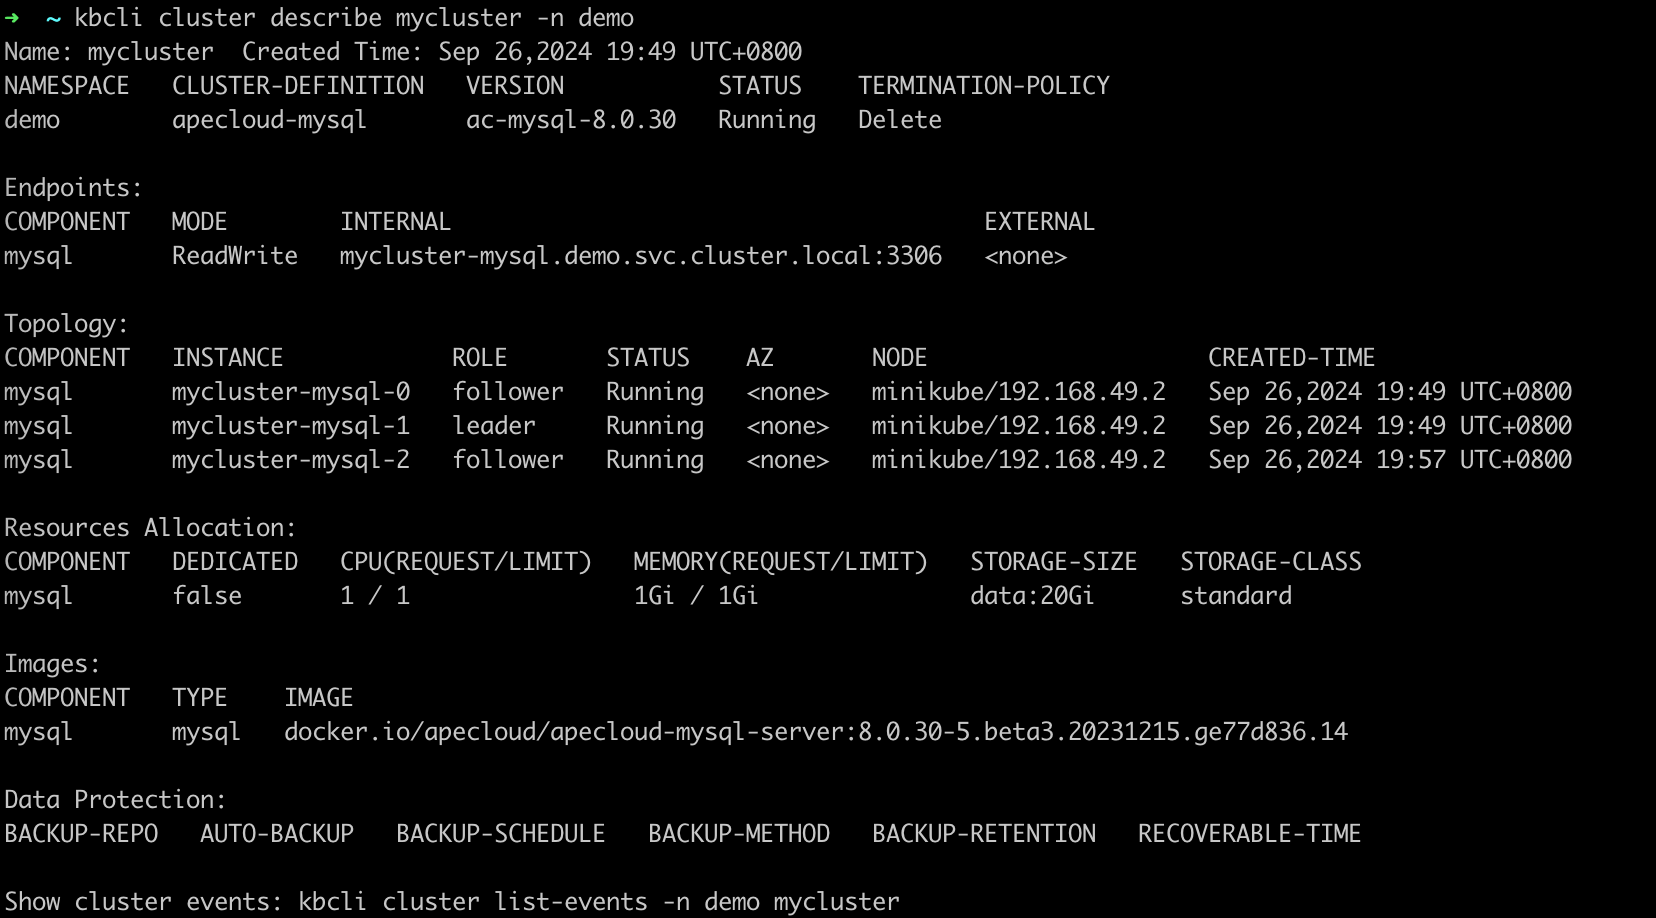
ApeCloud MySQL 集群版可以在几秒钟恢复连接。
kbcli cluster connect mycluster -n demo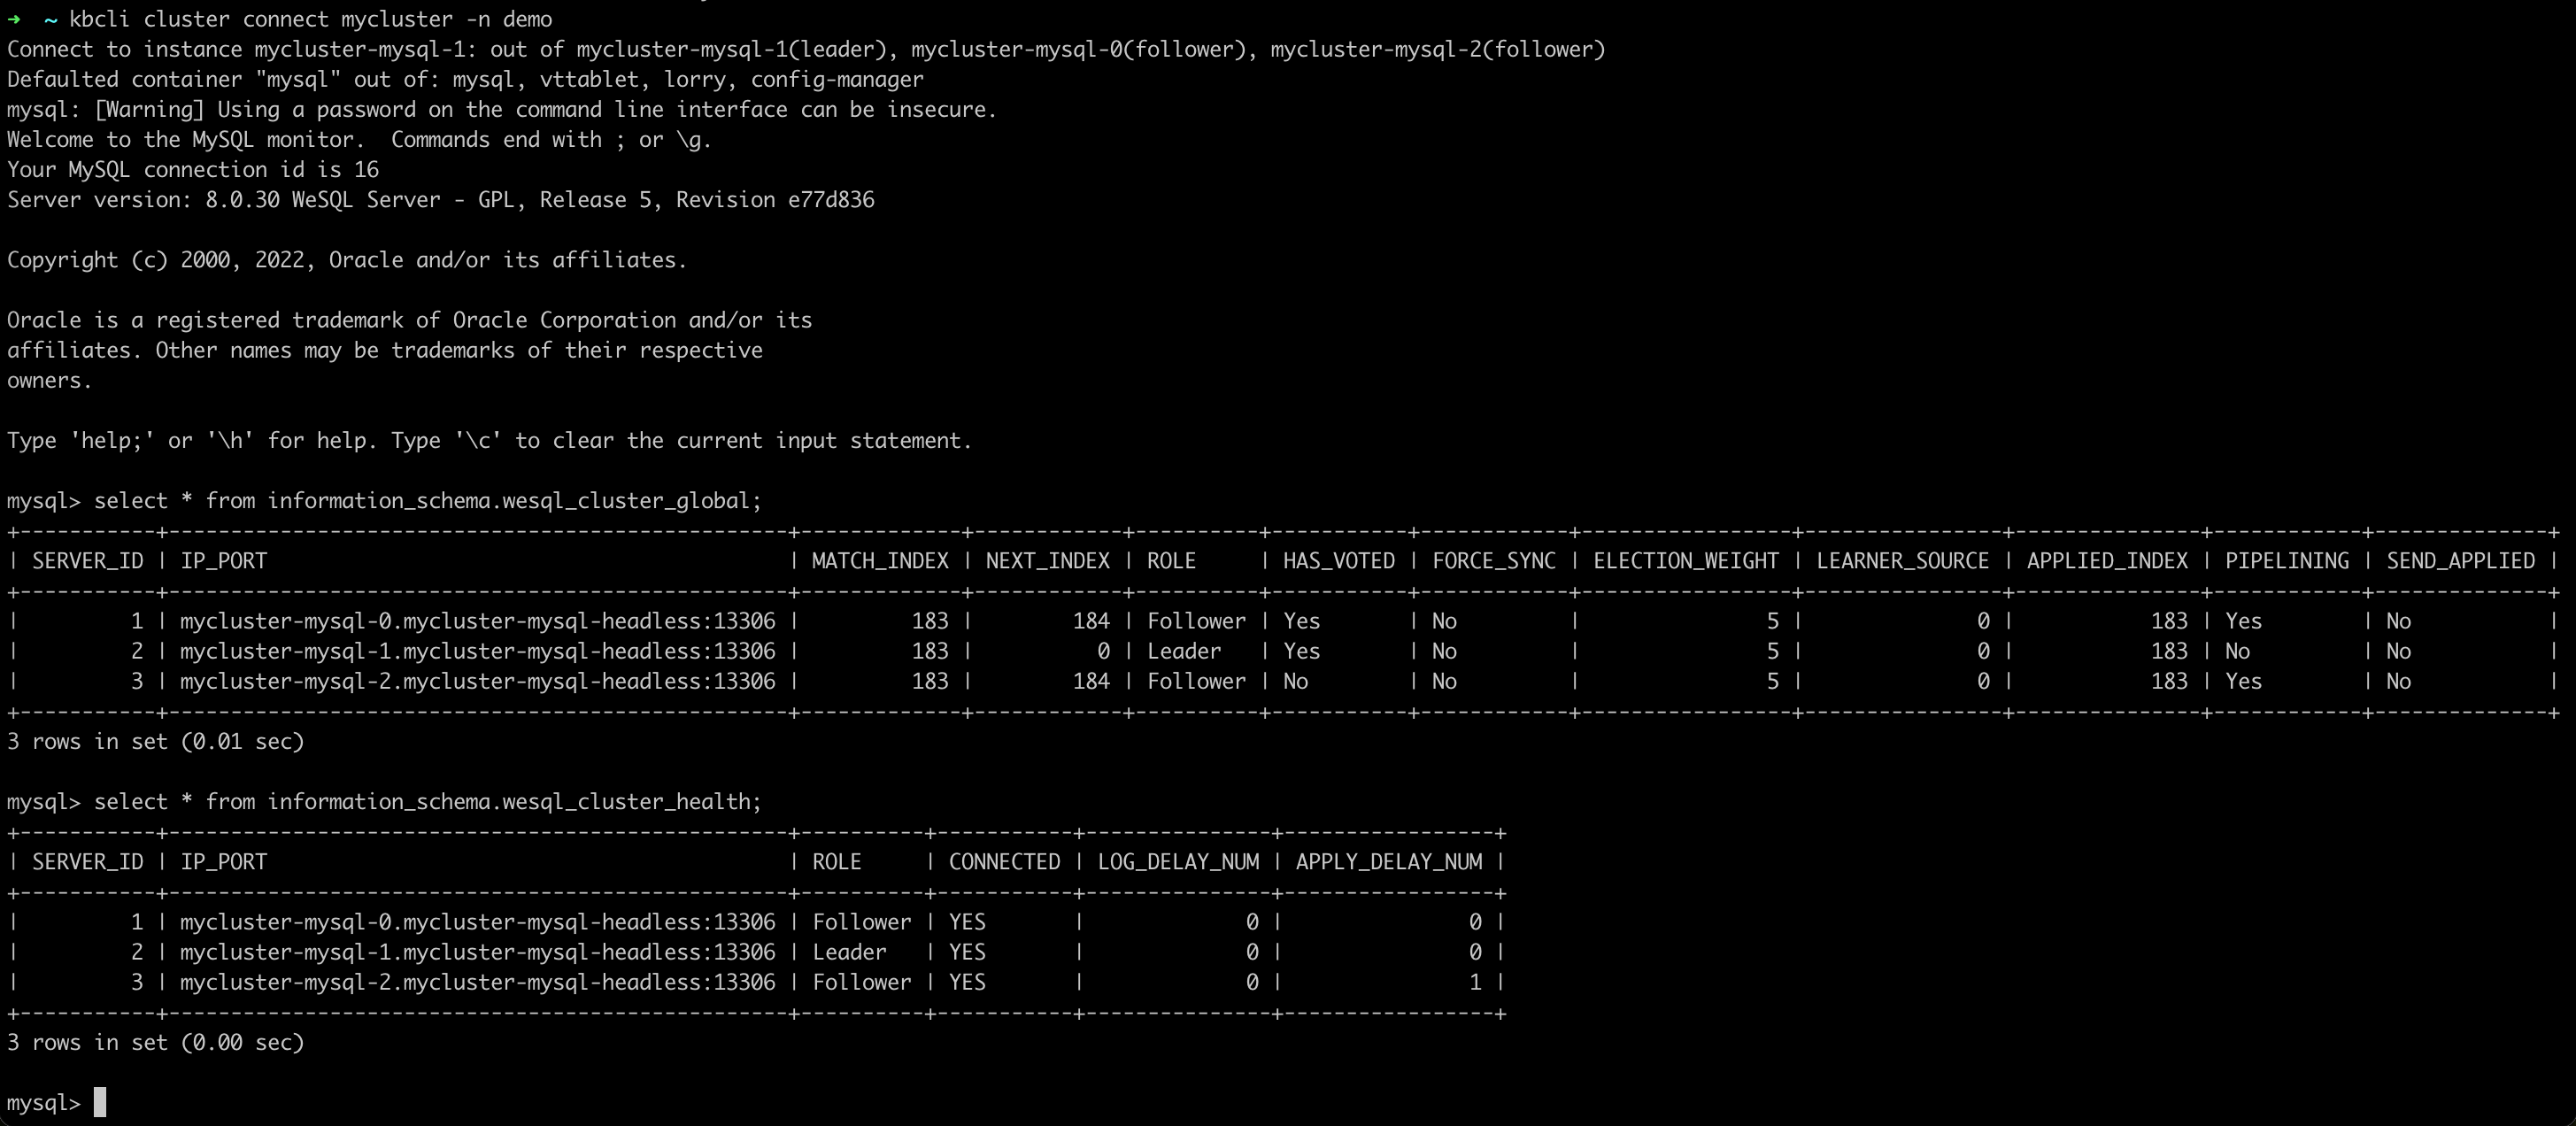
自动恢复机制
这是因为 Leader 节点删除后,ApeCloud MySQL 集群版会自行选主,选出新的 Leader 为 mycluster-mysql-1,KubeBlocks 探测到 Leader 角色发生变化,会发出通知,更新访问链路。原先异常节点会自动重建,恢复正常三节点状态。从异常开始到恢复完成,整体耗时在 30 秒内。
-
查看 ApeCloud MySQL 集群版 pod 角色。在本示例中,Leader 节点为
mycluster-1。kubectl get pods --show-labels -n demo | grep role
-
删除 Leader 节点
mycluster-mysql-1,模拟节点故障。kubectl delete pod mycluster-mysql-1 -n demo
-
检查 pod 状态和集群连接。
此处示例显示 pod 角色发生变化。原 Leader 节点删除后,系统选出新的 Leader 为
mycluster-mysql-0。kubectl get pods --show-labels -n demo | grep role
连接到该集群,检查 pod 角色和状态。该集群可在几秒内连接成功。
kubectl get secrets -n demo mycluster-conn-credential -o jsonpath='{.data.username}' | base64 -d
>
root

kubectl get secrets -n demo mycluster-conn-credential -o jsonpath='{.data.password}' | base64 -d
>
pt2mmdlp4

kubectl exec -ti -n demo mycluster-mysql-0 -- bash

mysql -uroot -pt2mmdlp4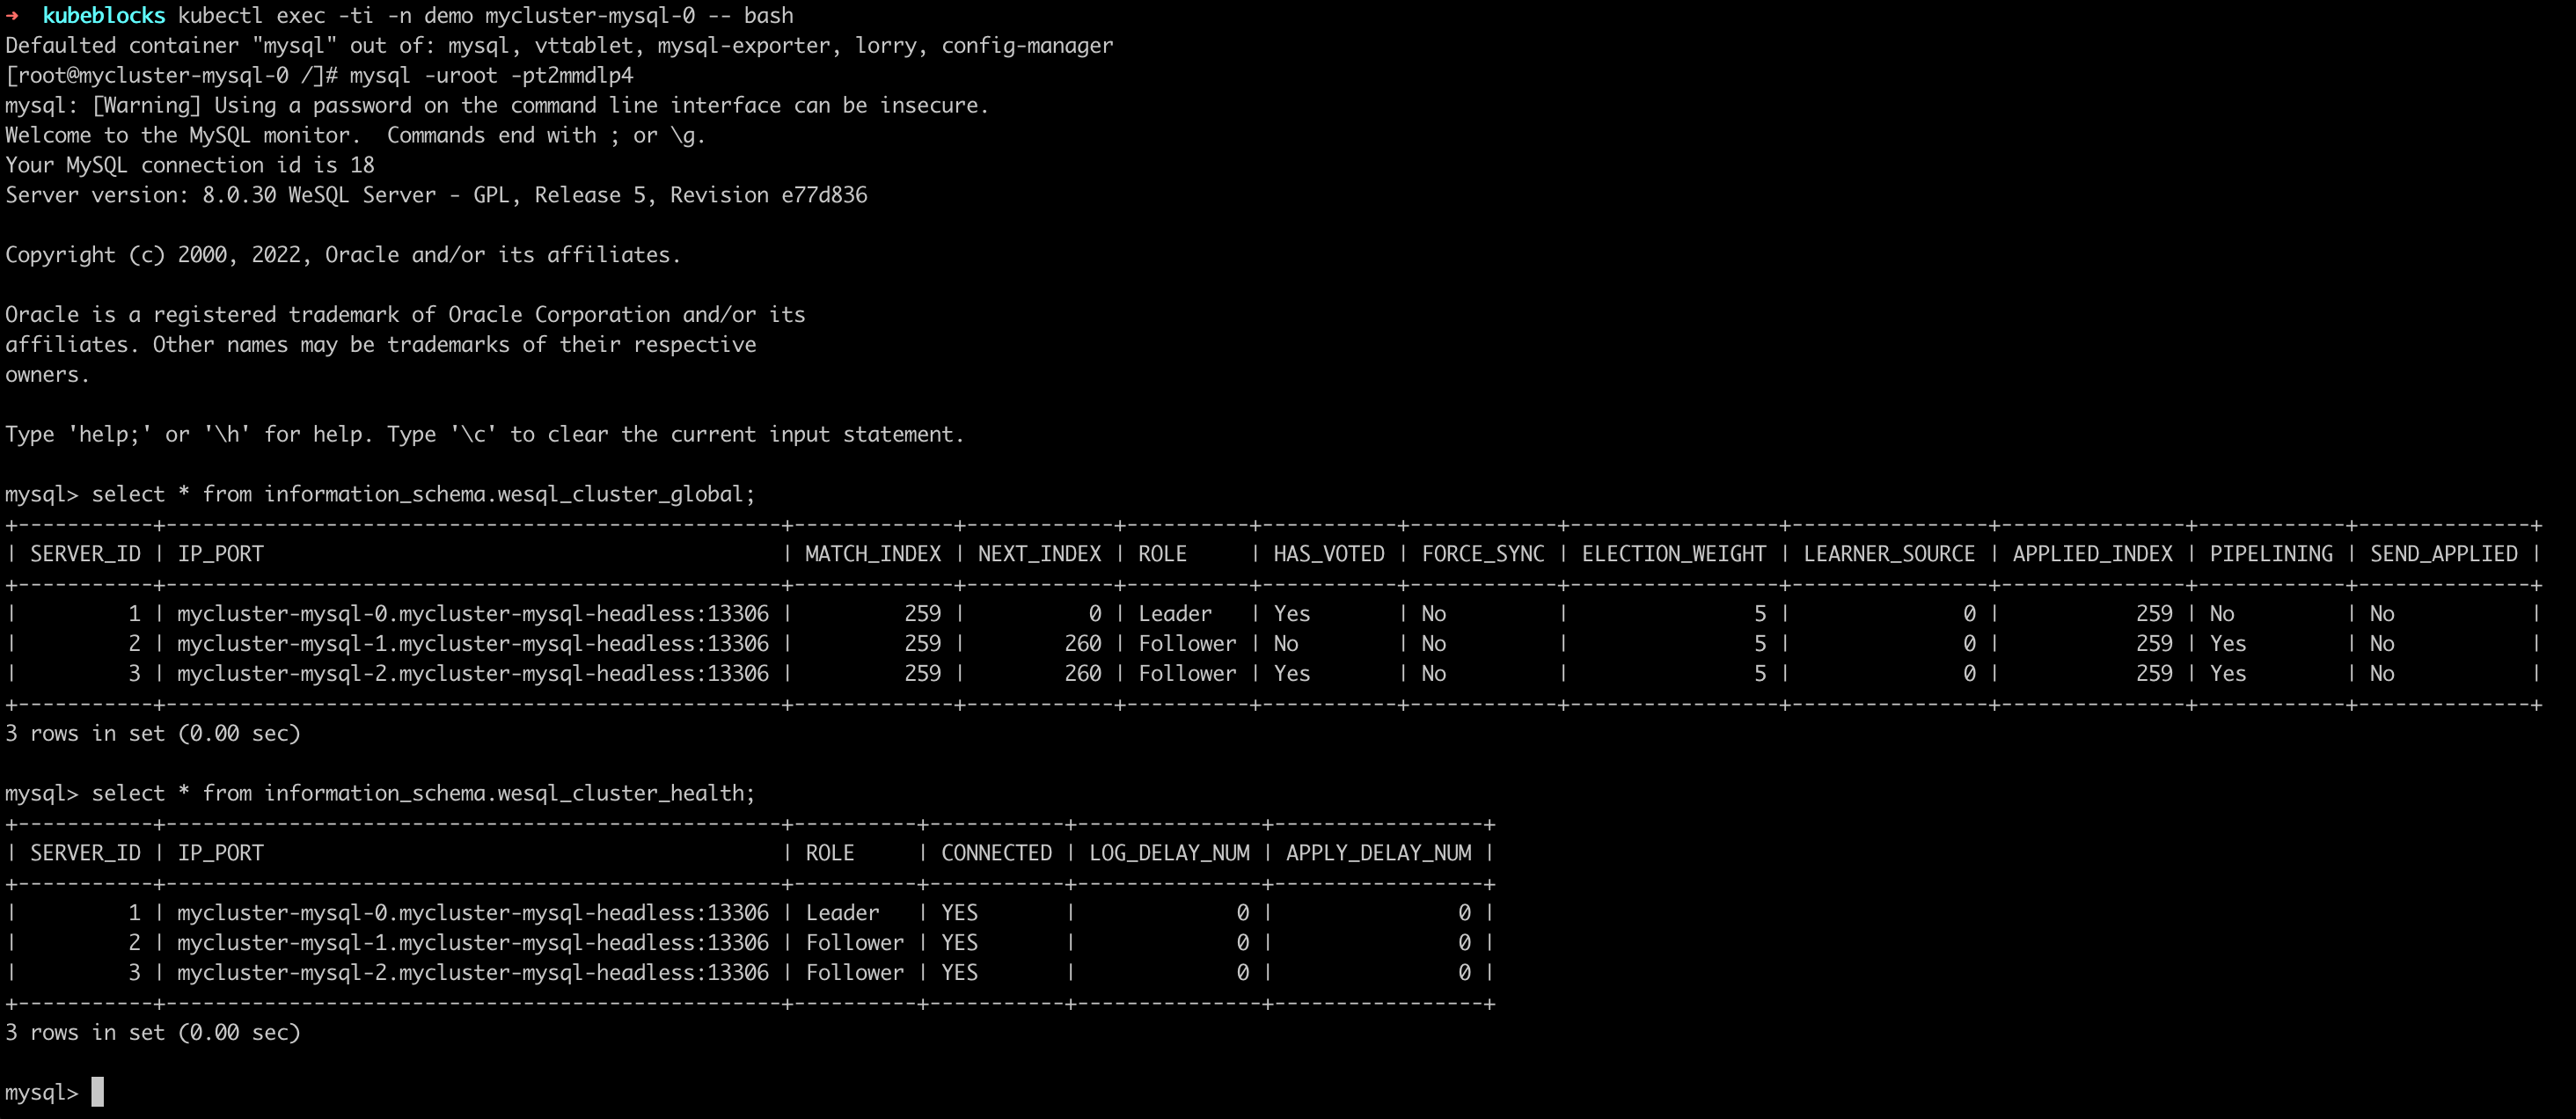
自动恢复机制
Leader 节点删除后,ApeCloud MySQL 集群版会自行选主。上述示例中,选出新的 Leader 为
mycluster-mysql-0,KubeBlocks 探测到 Leader 角色发生变化,会发出通知,更新访问链路。原先异常节点会自动重建,恢复正常集群版状态。从异常开始到恢复完成,整体耗时正常在 30s 之内。
单个 Follower 节点异常
步骤:
- kbcli
- kubectl
-
查看 ApeCloud MySQL 集群版。
在
Topology中查看 Follower 节点的名称。在这个例子中,Follower 节点是mycluster-mysql-0和mycluster-mysql-2。kbcli cluster describe mycluster -n demo
-
删除 Follower 节点
mycluster-mysql-0。kubectl delete pod mycluster-mysql-0 -n demo
-
查看集群状态,发现 Follower 节点处于
Terminating状态。kbcli cluster describe mycluster -n demo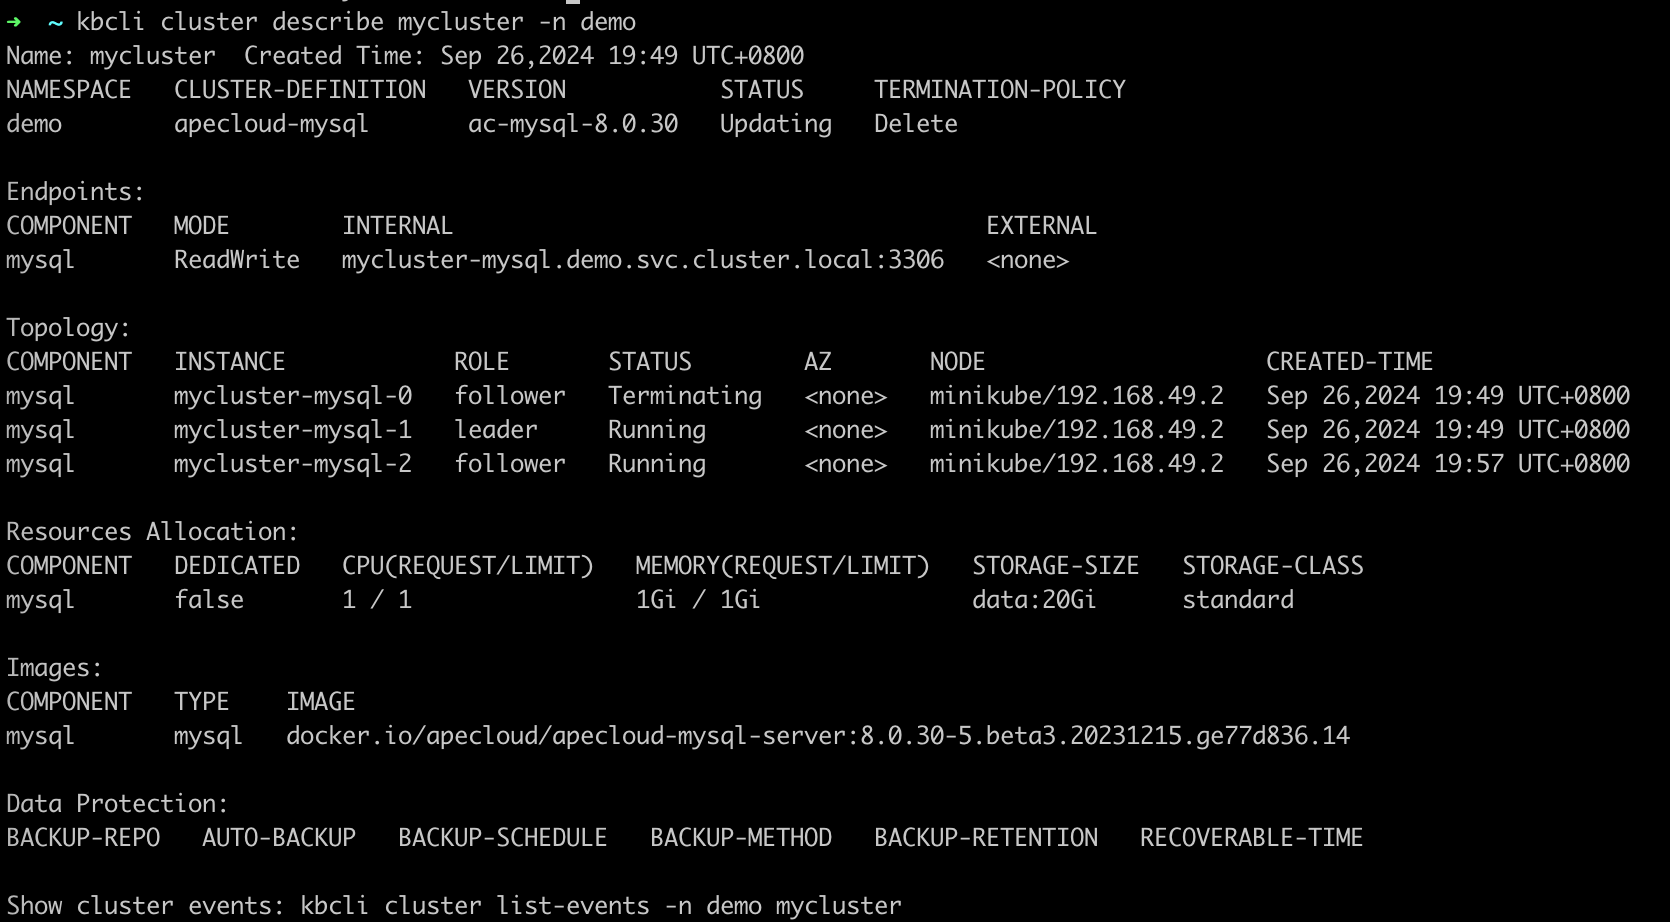
-
连接到 MySQL 集群版,发现单个 Follower 的异常不影响集群的读写操作。
kbcli cluster connect mycluster -n demo
-
查看 pod 角色,如下示例中 follower 节点为
mycluster-mysql-1andmycluster-mysql-2。kubectl get pods --show-labels -n demo | grep role
-
删除 follower 节点
mycluster-mysql-1。kubectl delete pod mycluster-mysql-1 -n demo
-
打开一个新的终端窗口,查看 pod 状态。可以发现 follower 节点
mycluster-mysql-1处于Terminating状态。kubectl get pod -n demo
再次查看 pod 角色。

-
连接集群,发现单个 Follower 节点异常不影响集群的读写操作。
kubectl exec -ti -n demo mycluster-mysql-0 -- bash

mysql -uroot -pt2mmdlp4
自动恢复机制
这是因为单个 Follower 节点异常不会触发角色重新选主,也不会切换访问链路,所以集群读写不受影响,Follower 异常后会自动触发重建,恢复正常,整体耗时在 30 秒内。
两个节点异常
集群可用的前提是多数节点状态正常,当多数节点异常时,原 Leader 节点将自动降级为 Follower 节点。因此,任意两个节点异常都会导致最后仅存一个 Follower 节点。所以,无论是一个 Leader 和一个 Follower 发生异常,还是两个 Follower 发生异常,其故障表现和自动恢复情况都是一样的。
步骤:
- kbcli
- kubectl
-
查看 ApeCloud MySQL 集群版。
在
Topology中查看 Follower 节点的名称。在这个例子中,Follower 节点是mycluster-mysql-0和mycluster-mysql-2。kbcli cluster describe mycluster -n demo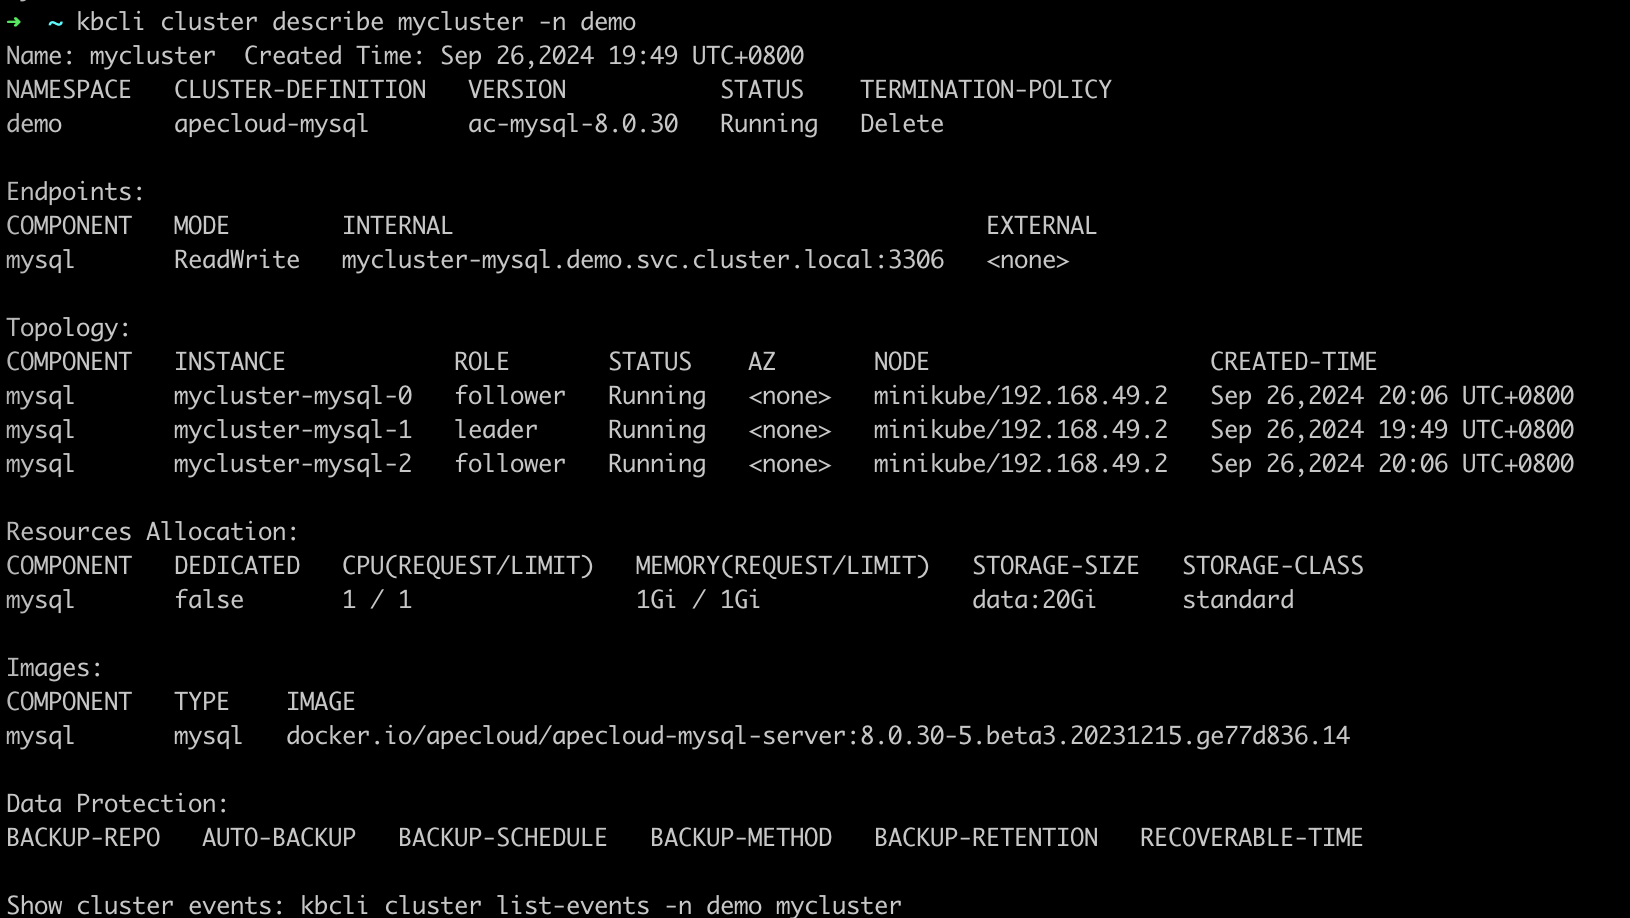
-
删除两个 Follower 节点。
kubectl delete pod mycluster-mysql-1 mycluster-mysql-0
-
查看 MySQL 集群版状态,发现集群自动选举出了新的 Leader 节点。
kbcli cluster describe mycluster -n demo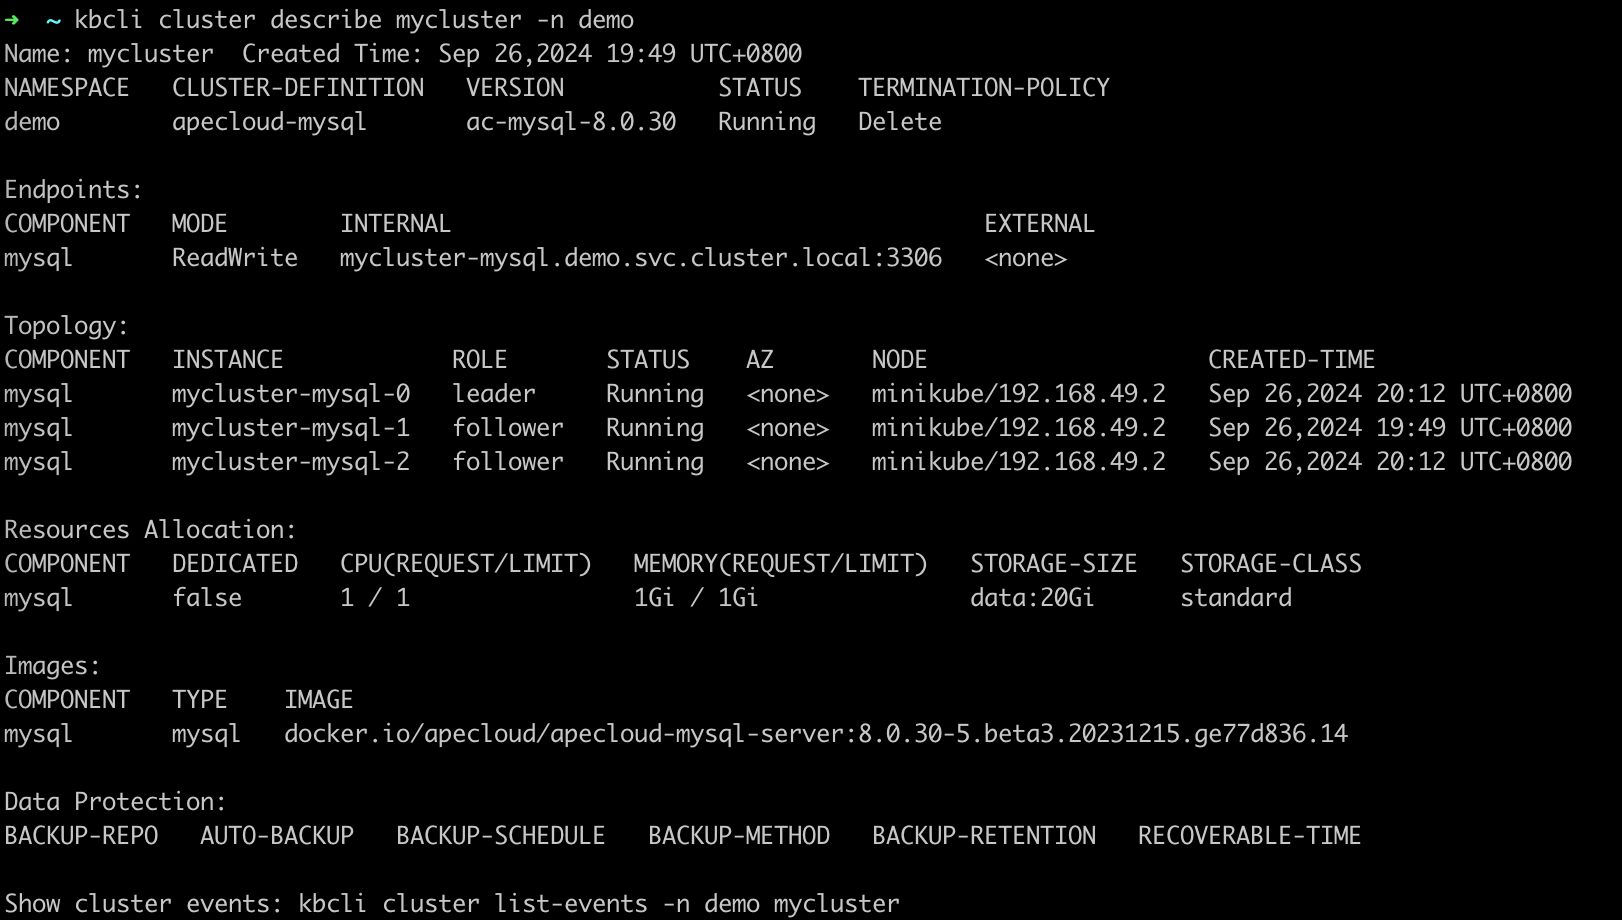
-
几秒钟后再次执行连接集群命令,数据库连接恢复正常。
kbcli cluster connect mycluster -n demo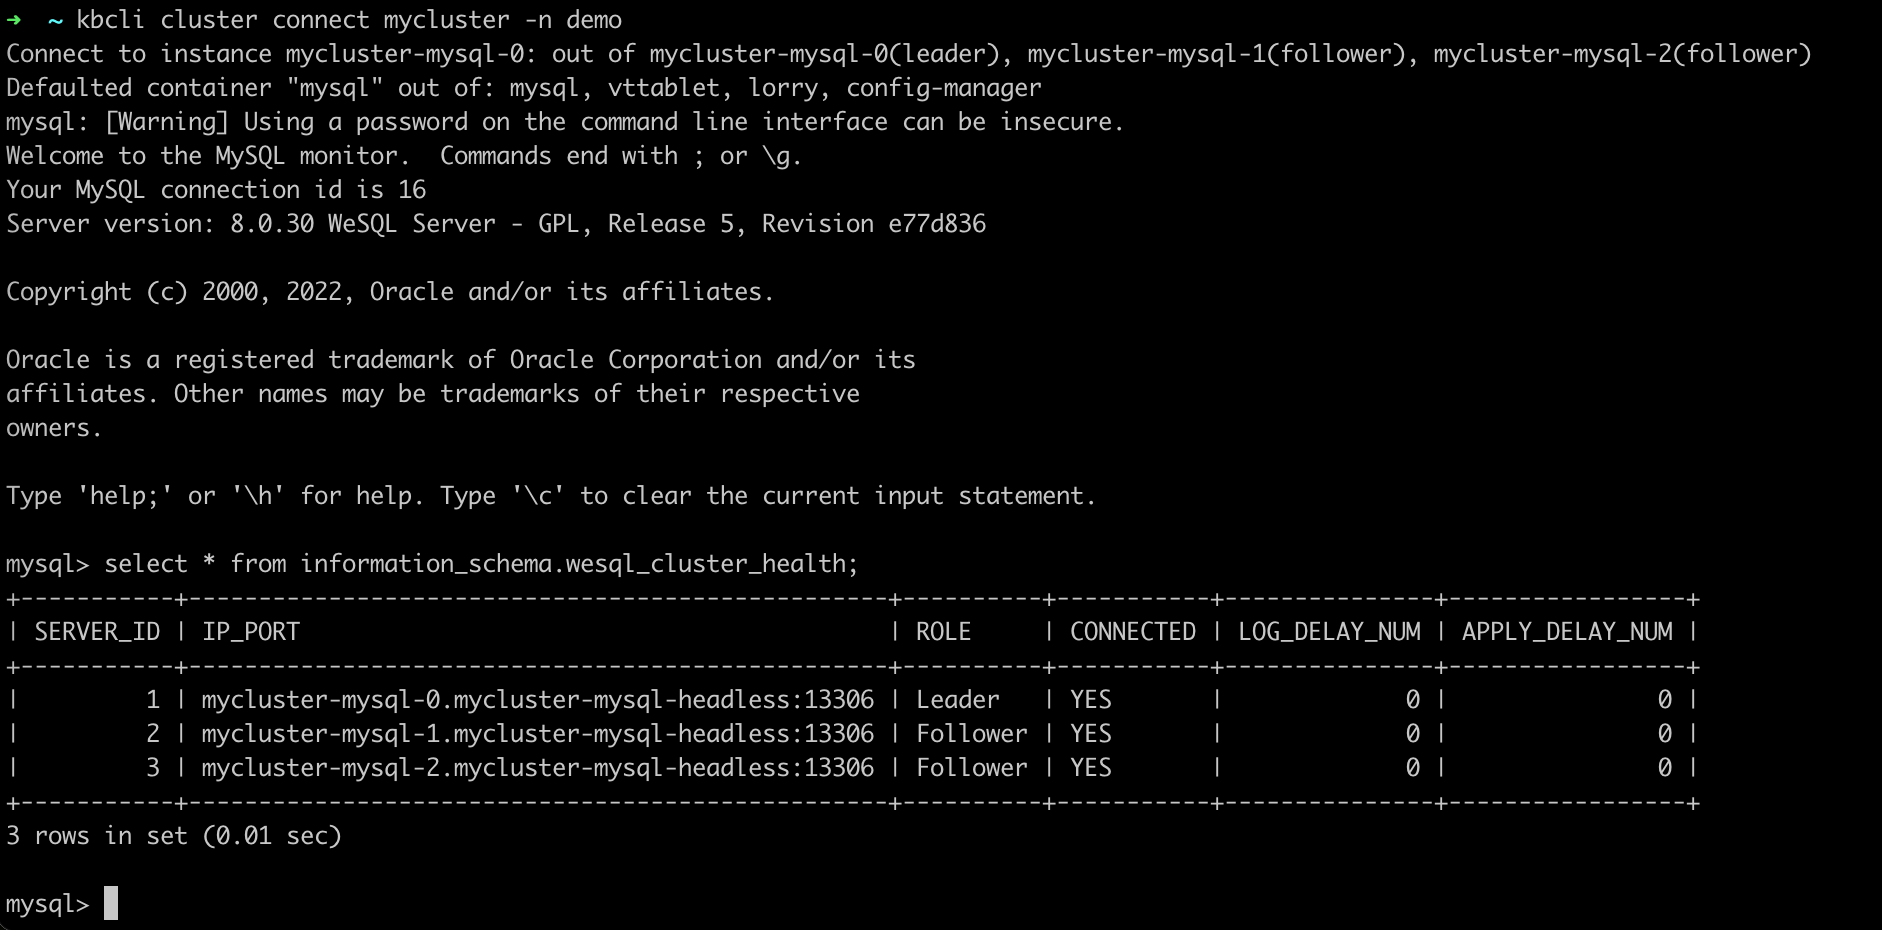
-
查看 Pod 状态。如下示例中,follower 节点为
mycluster-mysql-1和mycluster-mysql-2。kubectl get pods --show-labels -n demo | grep role
-
删除两个 follower 节点。
kubectl delete pod mycluster-mysql-1 mycluster-mysql-2 -n demo
-
打开一个新的终端窗口,查看 pod 状态,发现两个 follower 节点
mycluster-mysql-1和mycluster-mysql-2都处于Terminating状态。kubectl get pod -n demo
查看节点角色,发现已选举产生新的 leader。
kubectl get pods --show-labels -n demo | grep role
-
稍等几秒后,连接集群,发现集群中的 pod 在此正常运行。
kubectl exec -ti -n demo mycluster-mysql-0 -- bash

mysql -uroot -pt2mmdlp4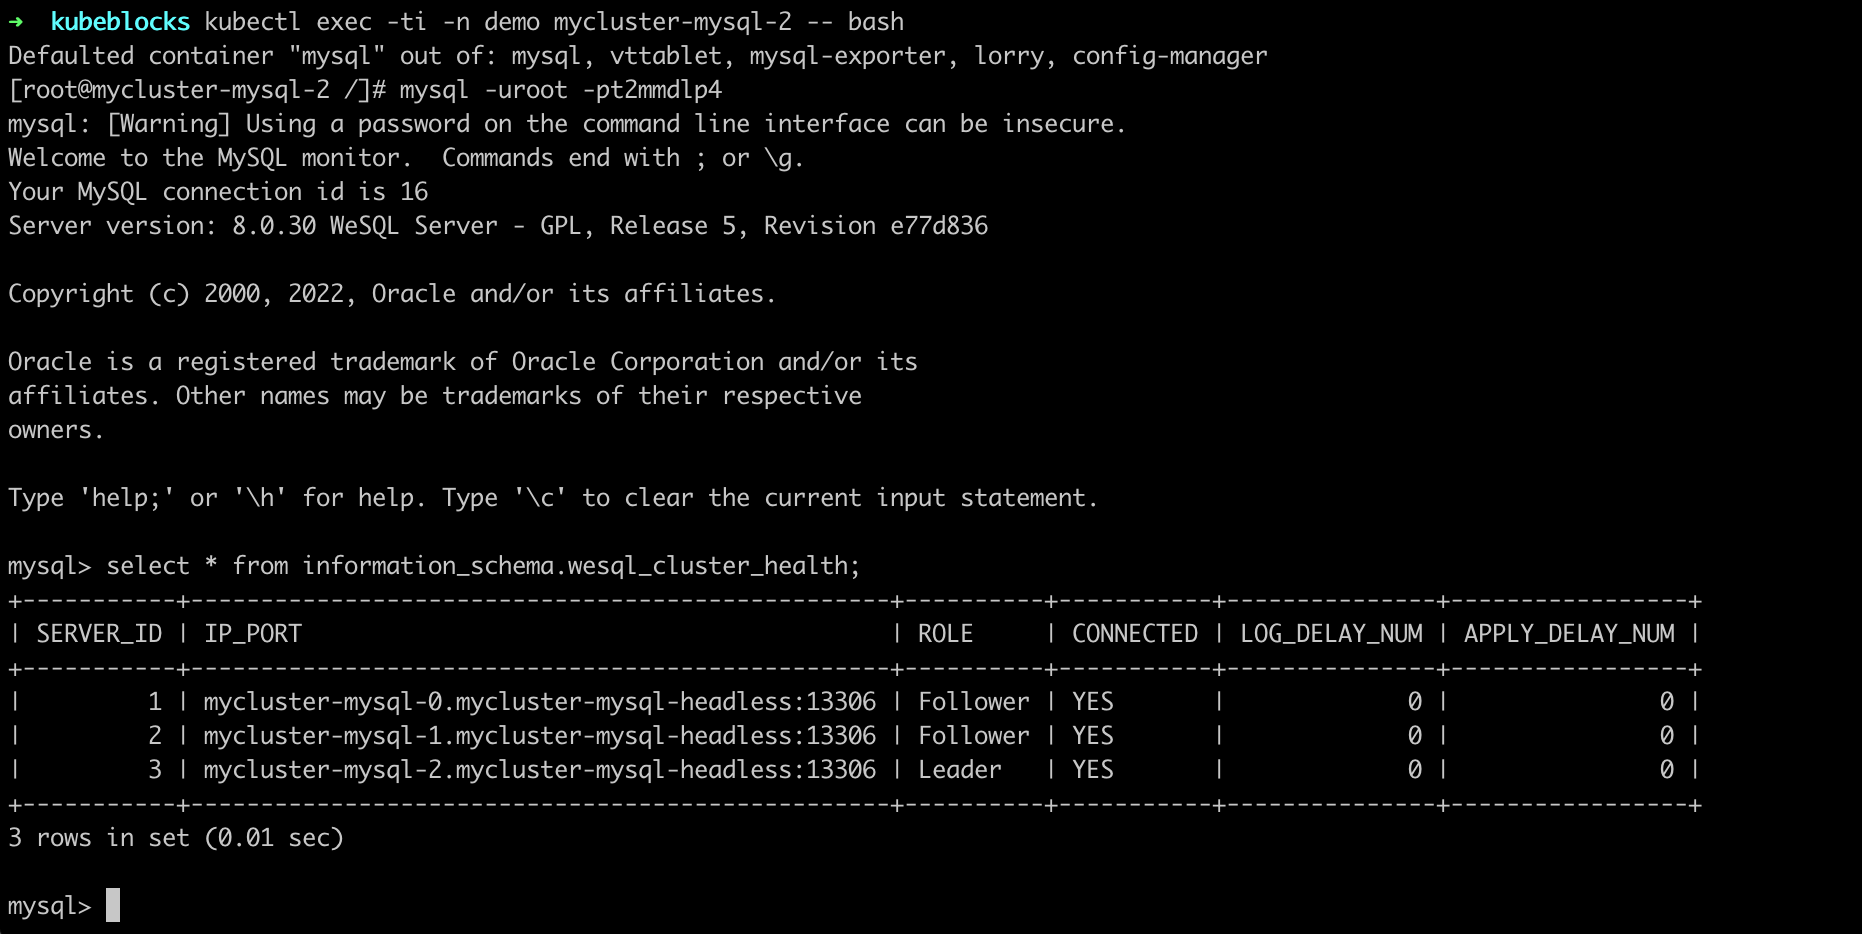
自动恢复机制
这是因为当 ApeCloud MySQL 两个节点异常时,满足多数节点不可用,导致 Leader 节点会自动降级为 Follower 节点,此时集群不可读写。待节点自动重建完成后,集群重新选出 Leader 节点恢复到可读写状态。整体耗时在 30 秒内。
所有节点异常
步骤:
- kbcli
- kubectl
-
查看 ApeCloud MySQL 集群版。
在
Topology中查看节点名称。kbcli cluster describe mycluster -n demo
-
删除所有节点。
kubectl delete pod mycluster-mysql-1 mycluster-mysql-0 mycluster-mysql-2 -n demo
-
查看集群状态,发现节点角色发生改变。
kbcli cluster describe mycluster -n demo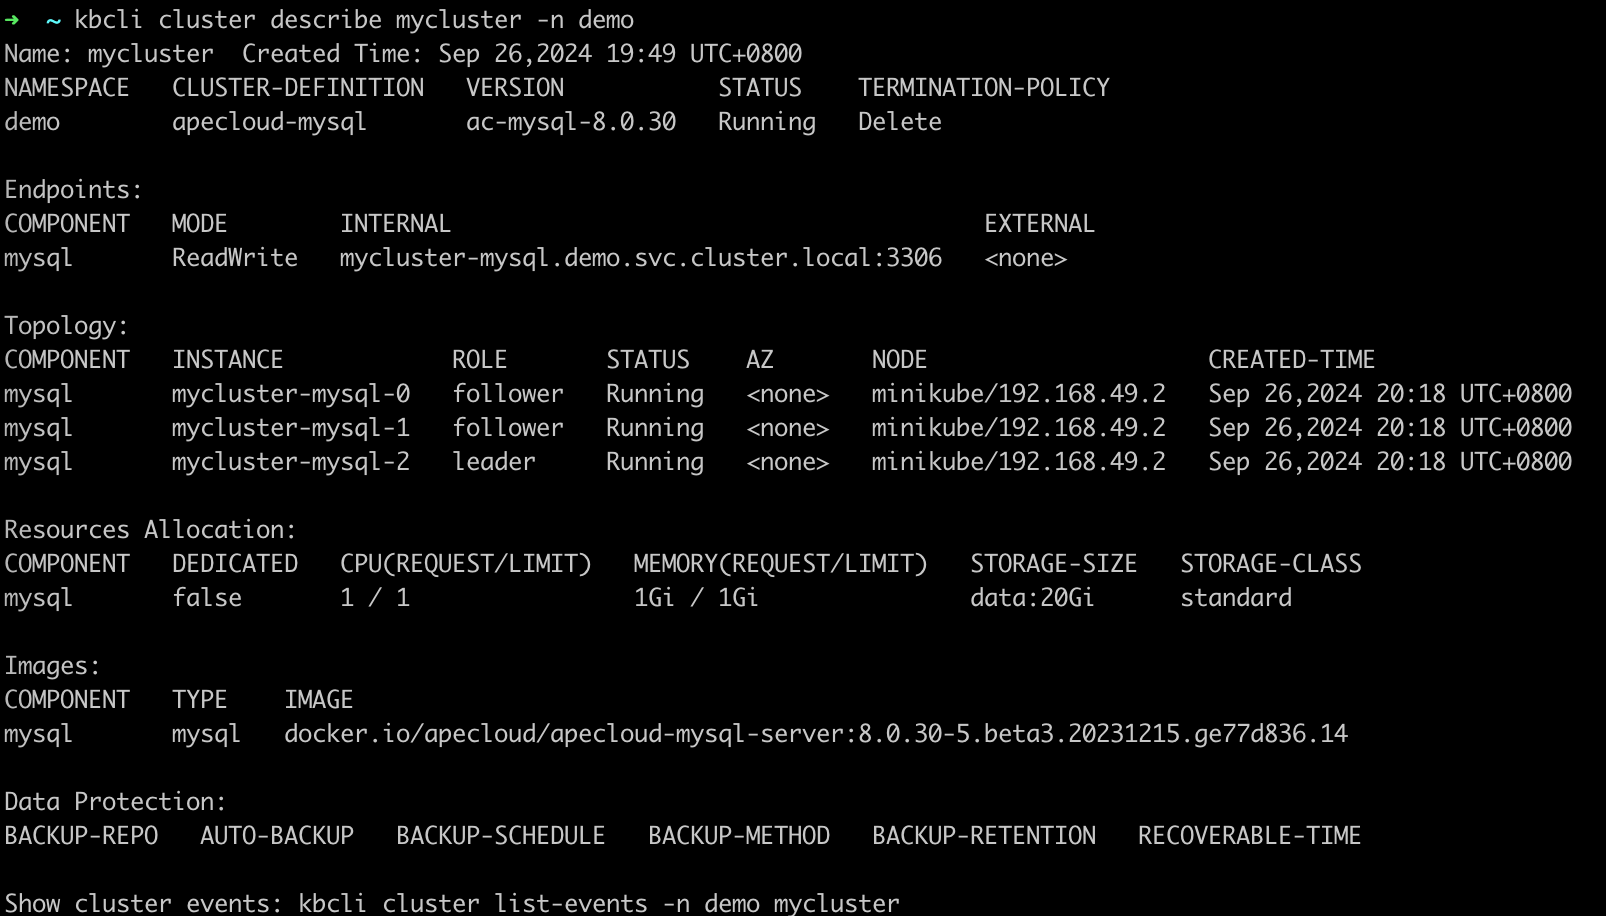
-
几秒钟后再次执行
kbcli cluster connect mycluster,数据库连接恢复正常。kbcli cluster connect mycluster -n demo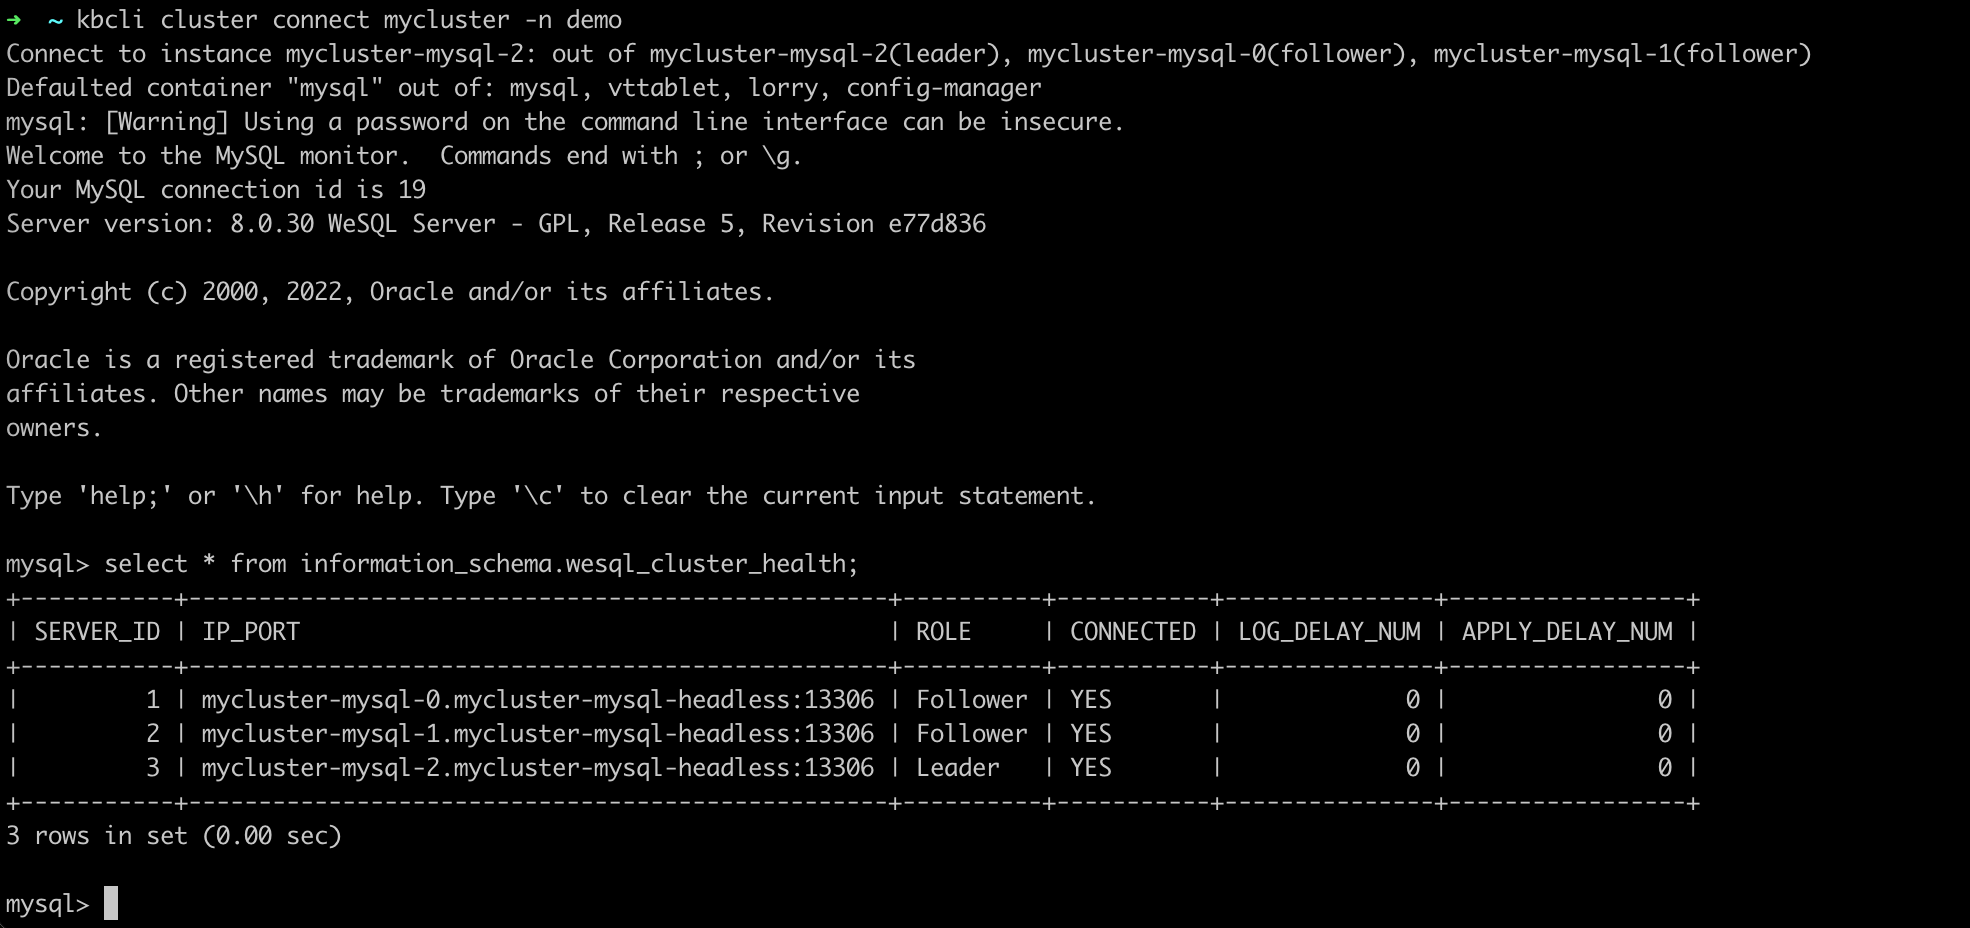
-
查看节点角色。
kubectl get pods --show-labels -n demo | grep role
-
删除所有节点。
kubectl delete pod mycluster-mysql-1 mycluster-mysql-0 mycluster-mysql-2 -n demo
-
打开一个新的终端窗口,查看 pod 状态,发现所有 pod 均处于
Terminating状态。kubectl get pod -n demo
-
再次查看节点角色,发现已选举产生新的 leader。
kubectl get pods --show-labels -n demo | grep role
-
稍等几秒后,连接集群,发现集群中的 pod 已恢复正常运行。
kubectl exec -ti -n demo mycluster-mysql-0 -- bash

mysql -uroot -pt2mmdlp4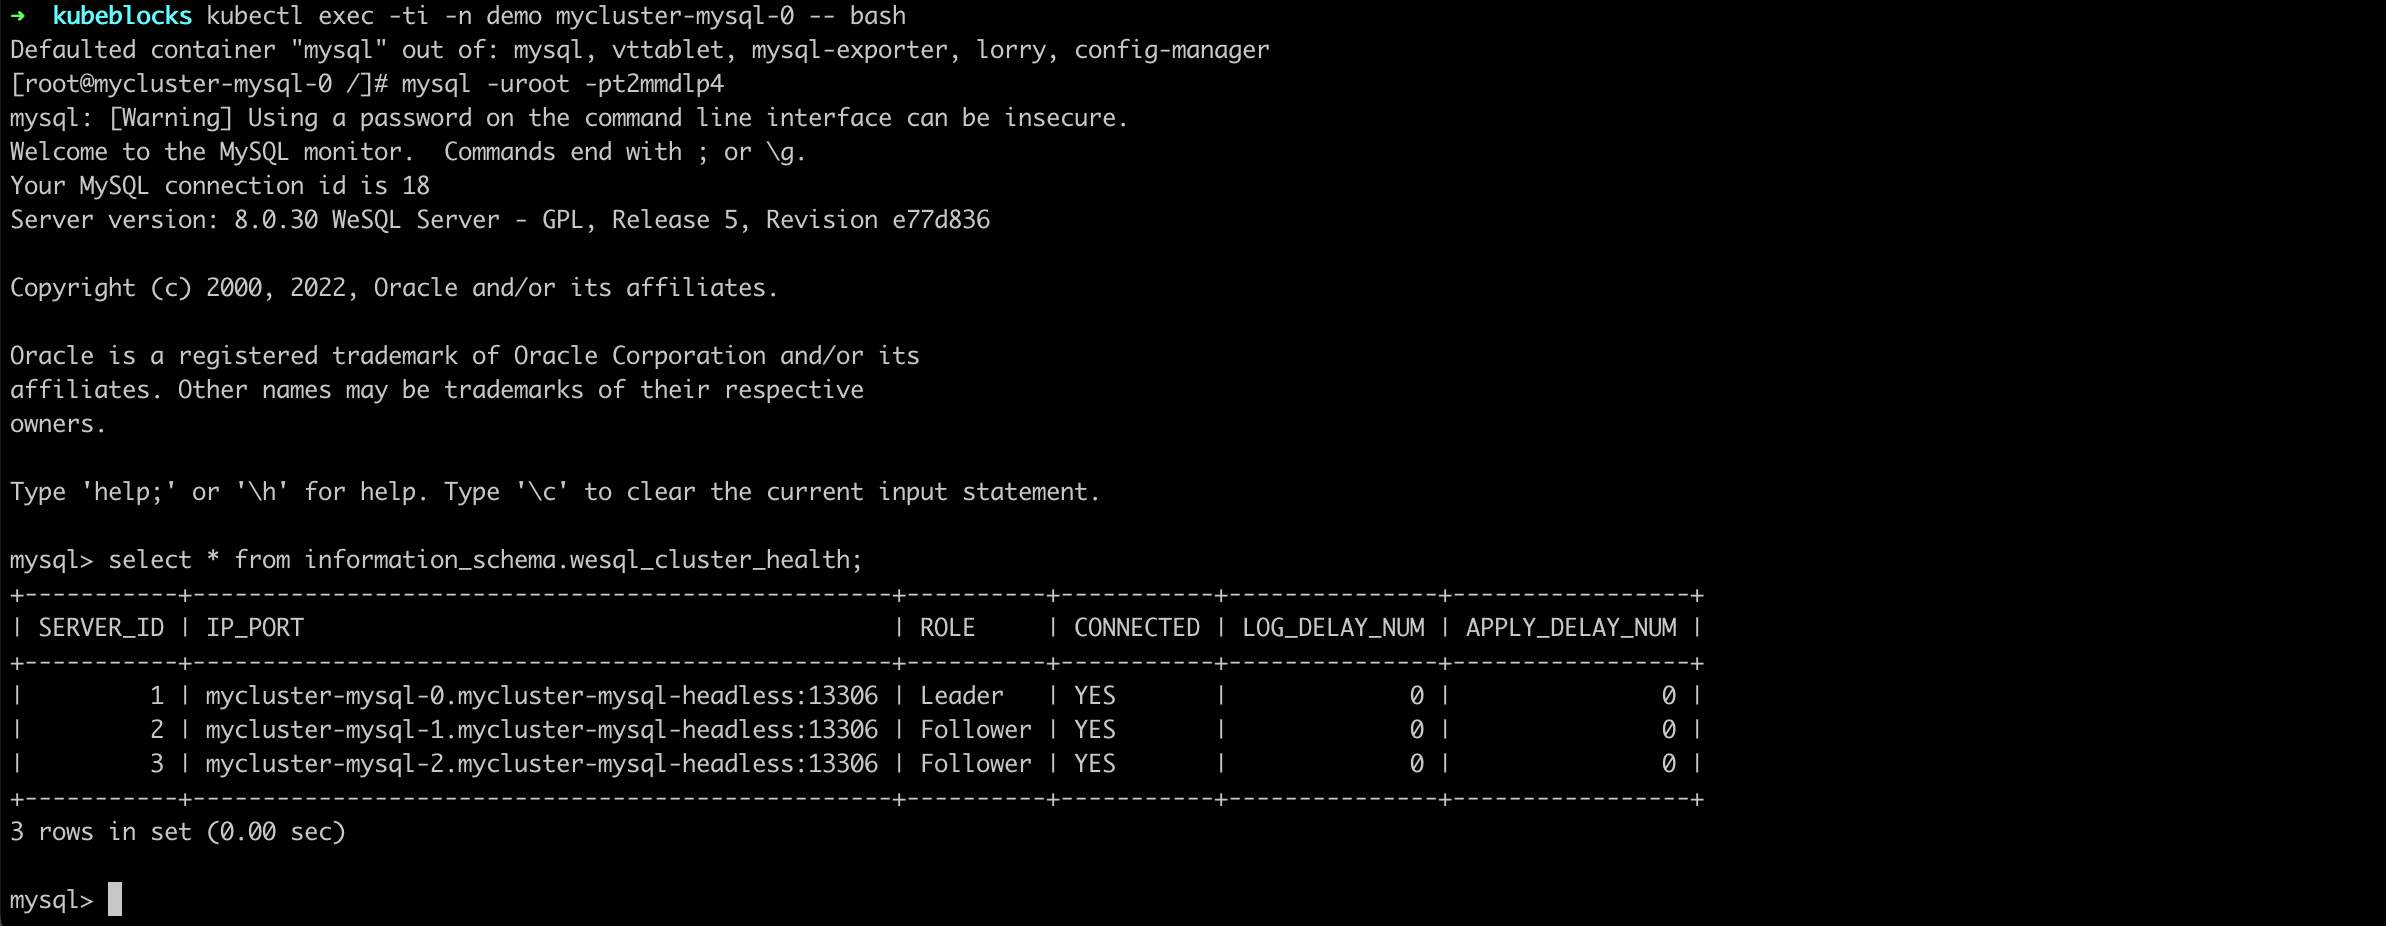
自动恢复机制
这是因为节点删除后,都会自动触发重建,然后 ApeCloud MySQL 会自动完成集群恢复及选主。选主完成后,Kubeblocks 会探测新 Leader,并更新访问链路,恢复可用。整体耗时在 30 秒内。